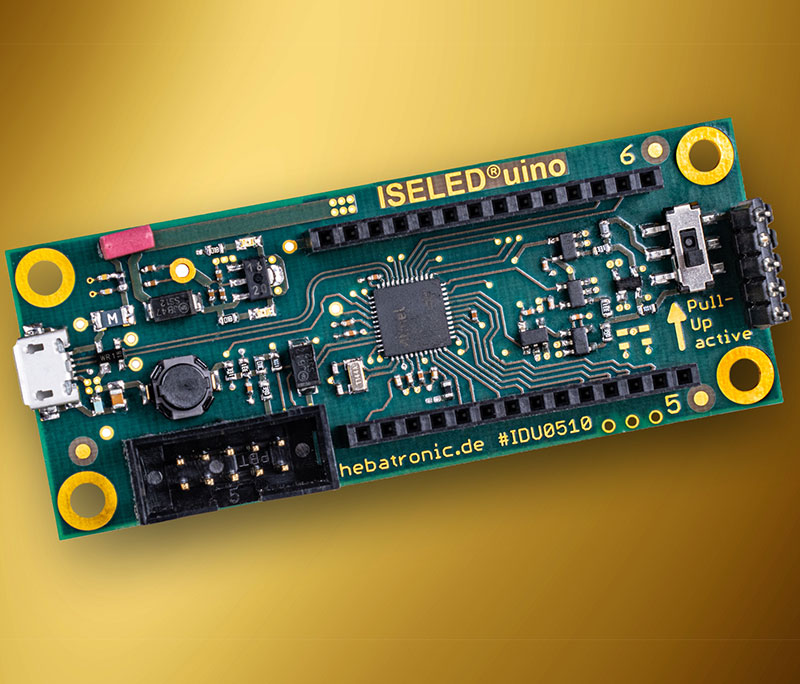
Advantages of our ISELED®uino
- Easy to program – use the programming platform of your choice
- Small dimensions – size counts
- Compatible with MKR shields – such as Ethernet, CAN, RS485 and many more
- Arduino compatible – add switches, sensors, interfaces, displays and more
- Slide switch for ISELED® pull-up resistors – some existing ISELED® installations already have pull-ups
- The ISELED®uino may deliver a maximum of 500mA to connected LEDs. An ISELED® typically draws up to 40 mA at maximum brightness.
- If the LEDs are supplied with their own 5V power supply, the jumper on the ISELED®uino must be pulled so that there is no feedback into the USB port.
- ATTENTION: If you use an external power supply, make sure that the Gnd connection of LEDs and ISELED®uino exists. If you want to switch off, ALWAYS switch off +5V first, NEVER the Gnd connection.
- Segger-compatible programming interface – if you need to flash many boards, this makes your job easier.


Under the hood
The ISELED® have 5 V logic. In order to control ISELEDs® with a 3.3V µController, there are level shifters for the outputs P and N.
For hardware compatibility reasons, the first LED is fed with an SPI signal. The first LED automatically converts this signal into a proprietary differential bus signal. The cable length between the ISELED®uino and the first LED should not exceed 0.3 m if EMC plays a role. If you run into problems at longer distances, consider placing a “driver LED” closer to the ISELED®uino. The differential output signal of the driver LED is sufficient for more than 10 meters.
Simplest SW programming via Arduino IDE:
Library settings:
Select the number of LEDs in the ISELED.h file.
Select colour:
-
digiLED.setRGB(R, G, B, number of LEDs, {not used})
-
R, G, B values 0..255
-
Number of LEDs 1..4079; 0 = for everyone
-
Example: Set all LEDs to a specific colour:
digiLED.setRGB(64, 128, 255, 0, 0)
Setting the dimming level:
-
digiLED.setDIM(dim value R, dim value G, dim value B, number of LEDs, {not used})
-
Dimming values: 0…3 ; with 0 = brightest setting and 3 = darkest setting.
Note: Although you can set these values individually, keep the R, G, and B values the same unless you want to do very specific things.
Example: Set all LEDs to the darkest setting (so as not to overload your power supply):
- digiLED.setDIM(0, 0, 0, 0, 0)
Good to know: Once you have set the ISELEDs® to a specific colour and brightness, the LED will remain in that setting until a new value is sent to that LED or the power supply is interrupted.
This allows you to create beautiful crossfades, rainbows, moving dots and other effects.
ISELED® and ILaS® are registered trademarks of Inova Semiconductors GmbH
